In a peaceful evening, you’re nestled comfortably on your couch, enjoying some downtime. Suddenly, you receive an alert on your phone that someone is at your front door. You grab your phone, eager to see who it is, but to your dismay, the live view from your Blink camera isn’t working.
So, why is your Blink live view not working when you need it the most?
The answer lies in a complex web of technical glitches, connectivity issues, and software updates. The reasons behind your Blink camera’s live view not working can vary. Power cycling or resetting the Blink camera, updating the app, and factory resetting can resolve the problem.
In this article, I’ll give the common causes of this issue and explore potential solutions to get your camera back on track, ensuring you never miss a moment of surveillance again.
Contents
- 1 Why Is Live View Not Working On Blink Camera? 7 Reasons
- 2 Blink Camera Live View Not Working – 10 Ways To Fix It
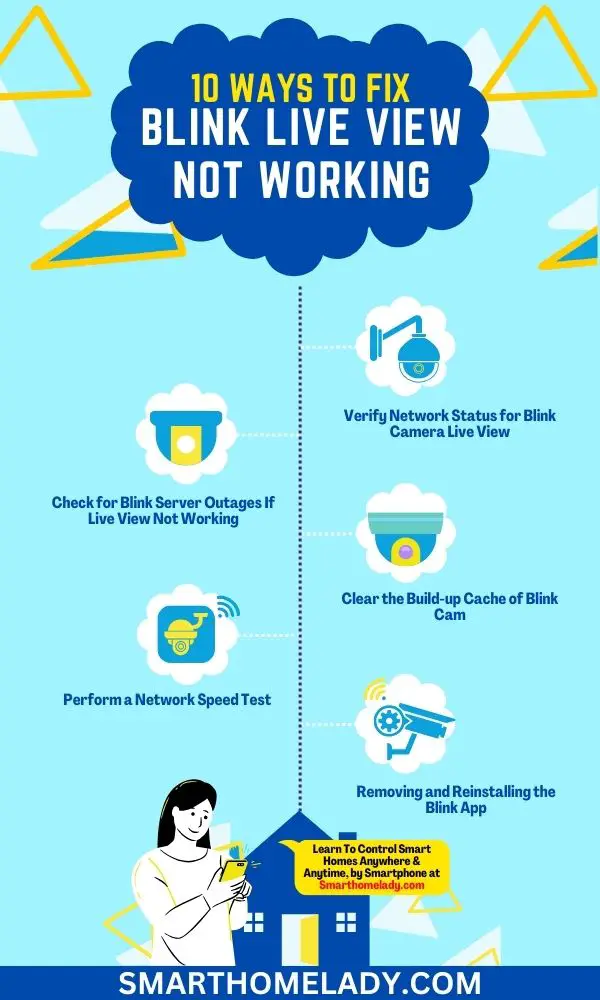
- 2.1 1. Power Cycling Of Blink Camera
- 2.2 2. Verify Network Status for Blink Camera Live View
- 2.3 3. Perform a Network Speed Test
- 2.4 4. Power Cycling of the Router
- 2.5 5. Upgrading the Blink App & Firmware
- 2.6 6. Removing and Reinstalling the Blink App
- 2.7 7. Check for Blink Server Outages If Live View Not Working
- 2.8 8. Test Other Camera Functionalities
- 2.9 9. Clear the Build-up Cache of Blink Cam
- 2.10 10. Factory Resetting of Blink Camera
- 3 Quick Fixes for Blink Live View Not Working
- 4 Advanced Solutions to Restore Blink Live View Functionality
- 5 Tips to Prevent Future Live View Problems With Blink
- 6 Conclusion
Why Is Live View Not Working On Blink Camera? 7 Reasons
Live view not working on Blink cameras can be caused by several factors. Below are the main reasons responsible for this issue:
- Weak or unstable Wi-Fi connection – If the camera is not receiving a strong and stable Wi-Fi signal, it may not be able to establish a live-view connection.
- Insufficient battery power – If the camera’s battery is running low, it may not have enough power to support the live view feature.
- Server or app issues – Occasionally, server or app-related problems may arise, resulting in the live view not working temporarily.
- Prolonged Cache build-up – Sometimes, Blink camera live view will not work due to prolonged cache build-up.
- Camera firmware needs updating – Outdated firmware can cause compatibility issues and prevent the live view from functioning properly.
- Interference from other devices – Nearby devices operating on the same frequency as the camera’s Wi-Fi signal can cause interference, leading to live view problems.
- Camera placement and distance – If the camera is placed too far away from the Wi-Fi router or obstructed by walls or other objects, it may have difficulty maintaining a stable live view connection.
By considering these possible reasons, troubleshooting and resolving the issue can be more efficient.
Blink Camera Live View Not Working – 10 Ways To Fix It
If you’re facing this problem, there are several troubleshooting steps you can take to get your Blink camera’s live view up and running again. Following are a few troubleshooting ways to resolve the issue.
1. Power Cycling Of Blink Camera
One of the first steps you should take when facing issues with the live view feature is to power cycle your Blink camera.
Power cycling involves disconnecting the camera from its power source and then reconnecting it after a short period. This simple process can help resolve temporary glitches and connectivity issues.
To power cycle your Blink camera, follow these steps:
- Locate the power adapter connected to your Blink camera.
- Unplug the power adapter from the power outlet or the camera itself.
- Wait for about 10 seconds.
- Plug the power adapter back into the power outlet or the camera.
By power cycling your Blink camera, you are essentially giving it a fresh start, which can often resolve minor issues causing live view problems.
2. Verify Network Status for Blink Camera Live View
Another important step in troubleshooting the Blink camera live view not working is to verify the network status. Poor network connectivity or a weak Wi-Fi signal can disrupt the live view feature.
To check the network status for your Blink camera, follow these steps:
- Ensure that your Wi-Fi router is powered on and functioning properly.
- Make sure that your Blink camera is within range of your Wi-Fi router.
- Check if other devices connected to the same network are experiencing any network issues.
- If possible, try connecting your Blink camera to a different Wi-Fi network to see if the live view works.
If the live view feature works on a different network, it indicates that the issue lies with your home network, and you may need to troubleshoot your router or contact your internet service provider for assistance.
3. Perform a Network Speed Test
To ensure that your network connection is fast and stable enough for the Blink camera’s live view, it’s recommended to perform a network speed test. This will help you identify any network speed issues that may be affecting the camera’s performance.
To perform a network speed test, follow these steps:
- Use a computer or smartphone and open a web browser.
- Search for “network speed test” and choose a reliable speed test website or app. I will recommend you to use “Speedtest” for this purpose.
- Run the speed test and note down the download and upload speeds.
- Compare the results with the minimum requirements mentioned by Blink for optimal camera performance. The blink system needs a minimum of 2Mbps upload speed. If it is lower than 2Mbps, then it can cause latency or other issues.
If the network speed test reveals that your internet connection is below the recommended threshold, consider upgrading your internet plan or contacting your internet service provider to resolve any speed-related issues.
4. Power Cycling of the Router
If power cycling your Blink camera didn’t resolve the live view issue, the next step is to power cycle your router. This process can help refresh the router’s settings and establish a stable connection with your Blink camera.
To power cycle your router, follow these steps:
- Locate the power cable connected to your router.
- Unplug the power cable from the power outlet.
- Wait for about 30 seconds to a minute.
- Plug the power cable back into the power outlet.
- Wait for the router to reboot and establish a connection fully.
By power cycling your router, you are ensuring that any temporary glitches or network congestion that may have been affecting the live view feature are resolved.
5. Upgrading the Blink App & Firmware
Blink regularly releases updates for their app and camera firmware to improve stability and add new features. It’s essential to keep your Blink app and camera firmware up to date to ensure optimal performance.
To upgrade your Blink app and firmware, follow these steps:
- Open the Blink app on your smartphone.
- Go to the settings menu and select “Check for Updates” or a similar option.
- If an update is available, follow the on-screen instructions to install it.
- Repeat the same process for the camera firmware.
By upgrading your Blink app and firmware, you can address any known bugs or compatibility issues that could be causing the live view not to work.
6. Removing and Reinstalling the Blink App
If the live view feature is still not working after upgrading the Blink app, you can try removing and reinstalling the app. This process can help resolve any software-related issues that may be affecting the app’s functionality.
To remove and reinstall the Blink app, follow these steps:
- Locate the Blink app on your smartphone’s home screen.
- Press and hold the app icon until a menu appears.
- Select the option to uninstall or remove the app.
- Go to your device’s app store (Google Play Store or Apple App Store).
- Search for the Blink app and reinstall it.
By reinstalling the Blink app, you are essentially starting fresh with a clean installation, which can often resolve any app-related issues causing the live view problem.
7. Check for Blink Server Outages If Live View Not Working
Sometimes, the live view feature may not work due to server outages or maintenance on Blink’s end.
To check if there are any server issues, visit Blink’s official website or contact their customer support. They will be able to inform you if there are any ongoing server problems and provide an estimated time for resolution.
8. Test Other Camera Functionalities
If the live view feature is not working, checking if other camera functionalities are working correctly is essential.
Test features such as motion detection, recording, and playback to ensure that the camera itself is functioning properly.
If other functionalities are also affected, it indicates potential issues with the camera hardware or settings.
9. Clear the Build-up Cache of Blink Cam
Over time, the Blink camera’s cache can accumulate unnecessary data, which can lead to performance issues. Clearing the cache can help improve the camera’s overall performance, including the live view feature.
To clear the cache of your Blink camera, follow these steps:
- Open the Blink app on your smartphone.
- Go to the camera “Settings” menu.
- Select the option to “Clear Cache” or a similar option.
- Follow the on-screen instructions to clear the cache.
Clearing the cache will delete temporary files and data, allowing the camera to perform more efficiently.
10. Factory Resetting of Blink Camera
If none of the above steps have resolved the live view issue, you can try factory resetting your Blink camera. This process will restore the camera to its original factory settings, erasing any previous configurations or settings that may be causing the live view issue.
Here’s how you can factory reset your Blink camera:
1. Locate the reset button – On the back of your Blink camera, you will find a small reset button. It is usually located near the USB port or the battery compartment.
2. Press and hold the reset button – Press and hold the reset button for about 10 seconds using a small pin or a paper clip. You will notice the LED light on the camera flashing blue.
3. Release the reset button – After 10 seconds, release the reset button. The LED light will now turn off for a few seconds.
4. Wait for the camera to reset – The camera will take a few moments to reset itself. During this time, do not unplug or remove the batteries from the camera.
5. Set up the camera again – Once the camera has finished resetting, you will need to set it up again using the Blink app. Follow the on-screen instructions to reconnect the camera to your Wi-Fi network and configure any necessary settings.
By factory resetting your Blink camera, you can troubleshoot any persistent live view issues that software glitches or incorrect configurations may have caused.
Keep In Mind – Factory resetting process will erase all previously recorded footage, so make sure to back up any important recordings before resetting the camera.
Quick Fixes for Blink Live View Not Working
- Ensure that you have a strong Wi-Fi connection and check for any available firmware updates to fix the problem with your Blink camera’s live view.
- Try moving your camera closer to your router to increase connectivity, or consider using a Wi-Fi extender.
- Additionally, ensure no physical obstructions block the signal between the camera and the router.
- Ensure that the camera is placed in an area with good Wi-Fi coverage, and avoid placing it near other electronic devices that may interfere with the signal. It’s recommended to position the camera at a height of around 7-9 feet, facing the desired monitoring area.
Here is a table summarizing some quick fixes to improve your Blink camera’s live view
| Quick Fixes | Description |
|---|---|
| Check Wi-Fi | Ensure that you have a strong Wi-Fi connection |
| Firmware Update | Check for any available firmware updates |
| Increase Connectivity | Move the camera closer to your router or use a Wi-Fi extender |
| Camera Positioning | Place the camera in an area with good coverage and at proper height |
Advanced Solutions to Restore Blink Live View Functionality
If you’re experiencing difficulties with your Blink camera’s live view, the signal strength between your camera and the sync module may be weak, causing issues with the live view.
Here are some advanced solutions to help restore functionality to your Blink camera’s live view:
Live Streaming Alternatives
- Use the Blink app on your smartphone or tablet instead of relying solely on live view through a web browser.
- Utilize the ‘Watch Live’ feature in the app to access real-time video streaming from your Blink camera.
- Enable push notifications on your mobile device so that you receive alerts whenever your Blink camera detects motion.
Enhancing Live View Experience
- Make sure that your Wi-Fi network has sufficient bandwidth and a stable connection.
- Check if any obstructions, such as walls or large objects, block the signal between the camera and the sync module.
- Consider adding additional sync modules around your home to improve signal strength and coverage.
Tips to Prevent Future Live View Problems With Blink
To prevent future problems with your Blink camera’s live view, consider regularly checking for any potential obstructions that could weaken the signal between the camera and the sync module. This is essential in ensuring a smooth and uninterrupted live view experience.
Here are some tips for improving live view performance and troubleshooting connectivity issues.
First, make sure that both the camera and sync module have a clear line of sight to each other.
Avoid placing them behind objects like walls or furniture, as these can block the wireless signal. Additionally, keep them away from other electronic devices that may cause interference.
Secondly, check the Wi-Fi signal strength in the area where your Blink camera is installed. Weak Wi-Fi signals can lead to poor live view performance.
You can use a Wi-Fi analyzer app on your smartphone to identify any areas with low signal strength and adjust accordingly.
Furthermore, ensure that your Blink system has the latest firmware updates installed. These updates often include improvements in connectivity and overall performance.
Lastly, if you continue to experience connectivity issues despite following these tips, try moving the sync module closer to your router or consider adding a Wi-Fi extender to boost signal strength in that specific area.
Conclusion
So, if you’re experiencing issues with Blink Live View not working, you can take several troubleshooting steps to resolve the problem.
By following the quick fixes outlined in this article, such as checking your internet connection and ensuring your camera is properly positioned, you should be able to restore live view functionality.
If these solutions don’t work, advanced solutions like resetting your camera or contacting Blink support may be necessary.
Additionally, implementing preventive measures such as keeping your cameras updated and maintaining a strong Wi-Fi signal can help prevent future live view problems with Blink.