Are you struggling with your Blink Sync Module not connecting to WiFi? Don’t worry; I’ve got you covered.
Discover easy solutions to the common “Blink Sync Module Not Connecting to Wi-Fi” issue and regain control of your home security.
Imagine a hassle-free Blink camera system with uninterrupted access. In just a few minutes, I’ll guide you through troubleshooting and fixing the problem.
Say goodbye to Wi-Fi woes and hello to a smarter, more secure home with Blink. Let’s get started.
Contents
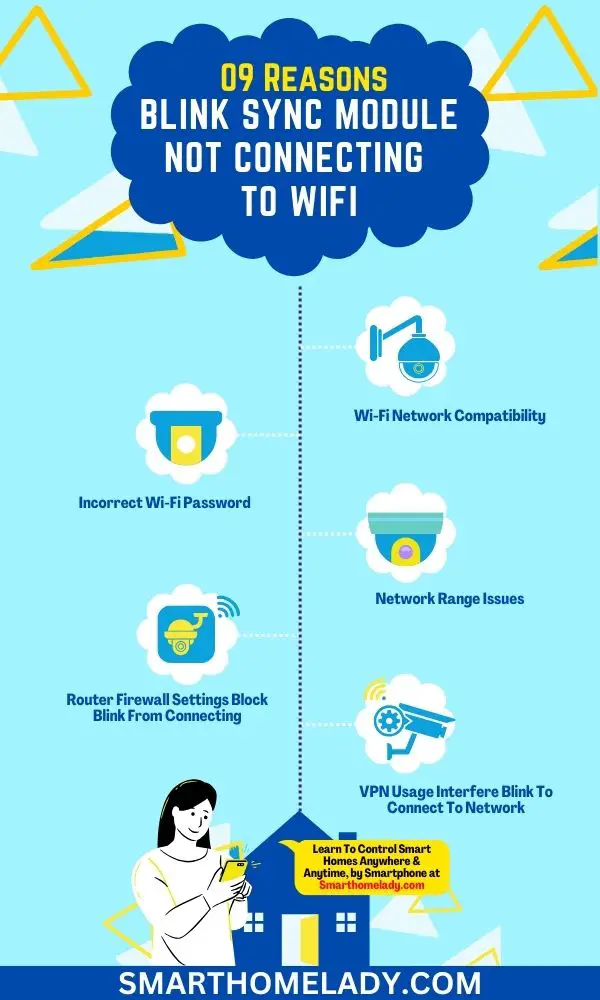
- 1 Why won’t my Blink camera connect to Blink network? 9 Common Scenarios
- 1.1 1. Wi-Fi Network Compatibility
- 1.2 2. Incorrect Wi-Fi Password
- 1.3 3. Network Range Issues
- 1.4 4. Router Firewall Settings Block Blink From Connecting
- 1.5 5. VPN Usage Interfere Blink To Connect To Network
- 1.6 6. Network Congestion
- 1.7 7. Firmware Updates
- 1.8 8. Camera Placement
- 1.9 9. Blink Account Issues
- 2 17 Troubleshooting Steps for Blink Sync Module Not Connecting to WiFi
- 2.1 1. Verifying Power and Cable Connections
- 2.2 2. Ensuring Blink Sync Module Is Powered On
- 2.3 3. Verifying Network Password
- 2.4 4. Assessing WiFi Signal Strength
- 2.5 5. Identifying Network Interference
- 2.6 6. Choosing 2.4 GHz over 5 GHz WiFi
- 2.7 7. Testing Network Speed and Stability
- 2.8 8. Power Cycling the Blink Sync Module
- 2.9 9. Resetting the Sync Module to Factory Settings
- 2.10 10. Updating Firmware for Improved Compatibility
- 2.11 11. Configuring Port Forwarding for Blink Devices To Enhance Connectivity
- 2.12 12. Disabling VPNs and Network Filters
- 2.13 13. Configuring Firewall Rules
- 2.14 14. Checking MAC Address Filtering
- 2.15 15. Creating a Guest Network for Blink Devices
- 2.16 16. Using WiFi Extenders and Mesh Systems
- 2.17 17. Contacting Blink Customer Support
- 3 Conclusion
Why won’t my Blink camera connect to Blink network? 9 Common Scenarios
Blink cameras are reliable home security devices, but they can face connectivity challenges due to various factors.
By addressing these common issues, you can increase the chances of successfully connecting your Blink camera to the Blink network.
Here are a few common reasons your Blink sync module is not connecting to WiFi.
1. Wi-Fi Network Compatibility
Blink cameras typically work on the 2.4GHz Wi-Fi frequency. If your Wi-Fi network is set to 5GHz, your camera may not connect.
Ensure your router has a 2.4GHz band; if necessary, switch your camera to this frequency.
2. Incorrect Wi-Fi Password
Sometimes, a simple typo can prevent your camera from connecting. Double-check that you’ve entered the correct Wi-Fi password during setup.
3. Network Range Issues
Blink cameras need a strong Wi-Fi signal to operate. If your camera is too far from your router, it may struggle to connect.
Try moving the camera closer to your router, or consider using a Wi-Fi extender.
4. Router Firewall Settings Block Blink From Connecting
Firewalls can block your camera from connecting to the Blink network. Ensure your router’s firewall settings allow the camera to access the internet.
Refer to your router’s manual or contact your internet service provider (ISP) for assistance.
5. VPN Usage Interfere Blink To Connect To Network
Using a Virtual Private Network (VPN) on your home network can sometimes interfere with your camera’s ability to connect to the Blink network.
Temporarily disable your VPN to see if it resolves the issue.
6. Network Congestion
High network traffic or congestion can disrupt your camera’s connection. If possible, try connecting during off-peak hours, or consider upgrading your internet plan for better bandwidth.
7. Firmware Updates
Outdated camera firmware can cause connectivity problems. Make sure your Blink camera is running the latest firmware version by checking the Blink app or the official Blink website.
8. Camera Placement
Ensure your camera is not obstructed by physical barriers like walls, furniture, or objects that could interfere with the Wi-Fi signal.
You should adjust the camera’s position for optimal connectivity.
9. Blink Account Issues
Verify that your Blink account is active and that you are using the correct login credentials.
Reset your password if necessary and ensure your subscription is up-to-date if you have a premium plan.
17 Troubleshooting Steps for Blink Sync Module Not Connecting to WiFi
Blink Sync Module serves as the bridge between your Blink cameras and your home network. When it’s unable to connect to WiFi, it can disrupt your entire security system.
Here, I will cover a range of troubleshooting steps to address this issue, ensuring you have peace of mind regarding your home’s safety.
| Steps | Description |
|---|---|
| Step 1. Verify Power and Cable Connections | – Check the power adapter connection. – Inspect power cable for damage. – Verify Ethernet cable connection if used. |
| Step 2. Ensure Blink Sync Module Is Powered On | – Check the power indicator LED on the module. – Restart the module if the LED is not illuminated. |
| Step 3. Verify Network Password | – Review the WiFi network name (SSID) and password in the Blink app. |
| Step 4. Assess WiFi Signal Strength | – Optimal placement of Sync Module. – Consider Blink camera locations. – Use WiFi analyzer apps. – Minimize signal interference. |
| Step 5. Identify Network Interference | – Identify sources of interference and reduce obstructions. |
| Step 6. Choose 2.4 GHz over 5 GHz WiFi | – Verify compatibility and connect to the 2.4 GHz band if possible. |
| Step 7. Test Network Speed and Stability | – Conduct speed and ping tests. – Reboot the router if necessary. |
| Step 8. Power Cycle the Blink Sync Module | – Unplug and plug in the power adapter. |
| Step 9. Reset the Sync Module to Factory Settings | – Locate and press the reset button. – Set up from scratch using the Blink app. |
| Step 10. Update Firmware for Improved Compatibility | – Check for firmware updates in the Blink app. – Reboot the Sync Module after updating. |
| Step 11. Configure Port Forwarding for Blink Devices | – Access the router’s web interface. – Create a port forwarding rule for the Sync Module. |
| Step 12. Disable VPNs and Network Filters | – Temporarily disable VPNs and network filters. |
| Step 13. Configure Firewall Rules | – Access the router’s web interface. – Create a rule allowing Sync Module access. – Reboot the router. |
| Step 14. Check MAC Address Filtering | – Locate Sync Module’s MAC address. – Add MAC address to allowed devices. – Reboot the router if needed. |
| Step 15. Create a Guest Network for Blink Devices | – Access the router’s settings. – Set up a dedicated guest network. – Connect devices to a guest network. |
| Step 16. Use WiFi Extenders and Mesh Systems | – Research and install WiFi extenders or mesh systems. – Connect devices to an extended network. |
| Step 17. Contact Blink Customer Support | – Visit the Blink support website or contact customer support for assistance. |
1. Verifying Power and Cable Connections
The first step is to ensure that your Blink Sync Module is receiving power adequately. Sometimes, a simple check and reconnection can resolve connectivity issues.
- Check if the power adapter is securely plugged into both the Sync Module and a functional power outlet.
- Examine the power cable for any signs of damage, such as fraying or exposed wires. Replace it if necessary.
If your Sync Module is connected to your router via an Ethernet cable, verify the integrity of this connection.
- Confirm that the Ethernet cable is firmly plugged into both the Sync Module and the router’s LAN port.
- Inspect the Ethernet cable for any physical damage that may hinder a stable connection.
2. Ensuring Blink Sync Module Is Powered On
The next step is to check if your Blink Sync Module is powered on and functioning correctly.
- Look for the power indicator LED on the Sync Module. A lit LED indicates that the module is receiving power.
- If the LED is not illuminated, unplug the power adapter, wait for approximately 10 seconds, and then plug it back in to reboot the Sync Module.
3. Verifying Network Password
An incorrect WiFi network password can prevent the Sync Module from connecting to your network. Verify that the password entered into the Blink app is accurate.
- Access the Blink app.
- Navigate to the Sync Module’s settings.
- Review the WiFi network name (SSID) and password entered in the app.
4. Assessing WiFi Signal Strength
A strong WiFi signal is crucial for your Blink Sync Module to connect reliably. Weak signals can result in intermittent connectivity and poor performance.
Here’s how to assess your WiFi signal strength:
- Placement of Sync Module – Ensure that your Blink Sync Module is placed within a reasonable range of your WiFi router. Walls and obstacles can weaken the signal, so try to minimize obstructions.
- Blink Camera Locations – Consider the placement of your Blink cameras. If they are far from the Sync Module, it’s essential to have a strong signal between the Sync Module and the cameras.
- WiFi Analyzer Apps – Use WiFi analyzer apps or built-in tools on your smartphone to check the signal strength in the Sync Module’s location. Look for a signal strength of at least -60 dBm for a stable connection.
- Signal Interference – Identify potential sources of interference like other electronic devices or neighboring networks operating on the same channel. Adjust your WiFi channel to minimize interference.
5. Identifying Network Interference
Identifying sources of network interference is crucial. Other electronic devices, thick walls, or neighboring networks can disrupt your WiFi signal.
So, you should mitigate interference by repositioning the Sync Module or reducing obstructions.
6. Choosing 2.4 GHz over 5 GHz WiFi
Blink devices often work more reliably on the 2.4 GHz WiFi band due to its longer range. This band provides better coverage and can penetrate walls and obstacles more effectively.
It’s suitable for devices that are not bandwidth-intensive.
Check your Blink Sync Module’s compatibility with both bands. Some models may only support one band.
If your router supports both 2.4 GHz and 5 GHz bands, consider connecting your Sync Module to the 2.4 GHz band for improved stability.
7. Testing Network Speed and Stability
Conducting speed and stability tests can pinpoint network issues. Use online speed testing tools to assess your network’s performance.
A slow or unstable connection may require troubleshooting with your Internet Service Provider (ISP).
Ensuring your network can handle the demands of your Blink Sync Module is crucial. Here’s how to test it:
- Speed Test – Use online speed test tools to measure your internet connection’s download and upload speeds. A stable connection should have consistent speeds, even during peak usage hours.
- Ping Test – Conduct a ping test to check for network stability. High ping times or packet loss can indicate network instability.
- Router Reboot – Occasionally, reboot your router to refresh the network connection. This can resolve minor network issues.
8. Power Cycling the Blink Sync Module
Power cycling, or simply restarting, your Blink Sync Module is often the first and most effective step in resolving connectivity issues. This process can reset the module, clear temporary glitches, and reestablish a connection to your WiFi network.
Here are steps to power cycle the blink sync module:
- Unplug the power adapter from the Blink Sync Module.
- Wait for about 10 seconds to ensure a complete power discharge.
- Plug the power adapter back in.
- Allow the Sync Module to restart. You’ll see the indicator lights on the module change during the boot-up process.
9. Resetting the Sync Module to Factory Settings
If power cycling doesn’t resolve the issue, you may need to perform a factory reset on your Blink Sync Module. This action erases all settings and configurations, so use it as a last resort.
You can reset the factory settings of the Blink sync module by following the method:
- Locate the small reset button on the Sync Module. It’s usually found near the power port.
- Use a paperclip or a similar tool to press and hold the reset button for approximately 10 seconds.
- Release the button when the LED indicator on the module starts flashing blue.
- The Sync Module will reset, and you’ll need to set it up again from scratch using the Blink app.
10. Updating Firmware for Improved Compatibility
Outdated firmware can lead to compatibility issues with your Blink Sync Module. Manufacturers often release firmware updates to address bugs, improve performance, and enhance device compatibility.
Ensuring your Sync Module is running the latest firmware can resolve connectivity problems.
Here are a few action steps that will assist you in updating the firmware of the Blink sync module:
- Open the Blink app on your mobile device.
- Navigate to the settings menu for your Sync Module.
- Check for available firmware updates. If an update is available, follow the on-screen instructions to install it.
- After the update is complete, reboot the Sync Module and test the connection to your WiFi network.
By following these troubleshooting steps, you can often resolve issues of the Blink Sync Module not connecting to WiFi.
11. Configuring Port Forwarding for Blink Devices To Enhance Connectivity
Port forwarding is a technique that can improve the connection between your Blink devices and the Blink servers.
By opening specific ports on your router, you enable direct communication between the devices and the Blink cloud service.
Here’s how to configure port forwarding:
- Access your router’s web interface. You’ll need to enter the router’s IP address in a web browser and log in using your router’s admin credentials.
- Locate the port forwarding section. This may be labeled differently depending on your router model.
- Create a new port forwarding rule for your Blink Sync Module. You’ll need to specify the device’s IP address and the ports used by Blink.
- Save the settings and reboot your router to apply the changes.
Configuring port forwarding can be a bit technical, so you may want to consult your router’s user manual or contact your router manufacturer’s customer support for detailed instructions.
12. Disabling VPNs and Network Filters
Virtual Private Networks (VPNs) and network filters are designed to enhance security and privacy, but they can also obstruct the connection between your Blink Sync Module and your WiFi network.
Disabling these features temporarily can help diagnose and resolve the issue.
13. Configuring Firewall Rules
Firewalls are essential for network security, but they can sometimes block legitimate connections, including those of your Blink Sync Module.
Configuring firewall rules allows you to specify which traffic is permitted and which is blocked.
You can configure firewall rules by following these steps:
- Access your router’s web interface.
- Navigate to the firewall or security settings.
- Create a rule that allows the Blink Sync Module to communicate freely with your WiFi network. This typically involves specifying the module’s IP address and permitting its access.
- Save the firewall rule and restart your router to apply the changes.
- Attempt to connect your Blink Sync Module to WiFi after configuring the firewall rules.
14. Checking MAC Address Filtering
MAC (Media Access Control) address filtering is a security feature that allows or denies network access based on specific device MAC addresses.
Ensuring that your Blink Sync Module’s MAC address is allowed on your network can resolve connectivity issues.
Follow these action steps to check MAC address filtering.
- Locate the MAC address of your Blink Sync Module. This information can often be found on the device or within the Blink app.
- Access your router’s web interface.
- Navigate to the MAC address filtering section.
- Add the MAC address of your Blink Sync Module to the allowed devices list.
- Save the changes and restart your router if necessary.
- Attempt to connect your Blink Sync Module to WiFi once the MAC address is permitted.
15. Creating a Guest Network for Blink Devices
Creating a dedicated guest network for your Blink devices can improve connectivity and security.
It isolates your cameras and Sync Module from your primary network, reducing potential interference and enhancing overall performance.
Follow these steps to create a guest network for Blink devices.
- Access your router’s web interface.
- Navigate to the settings for creating a guest network.
- Set up a separate WiFi network with a unique SSID (network name) and password.
- Connect your Blink Sync Module and cameras to the new guest network.
- Test the connection to ensure that the Blink devices operate smoothly on this dedicated network.
16. Using WiFi Extenders and Mesh Systems
If your Blink Sync Module is located far from your router, you may experience connectivity issues. WiFi extenders and mesh systems can help extend your network’s coverage, ensuring a strong signal reaches your Sync Module.
- Research and purchase a WiFi extender or mesh system that suits your home’s size and layout.
- Place the extender or mesh nodes strategically to cover areas where your Blink devices are located.
- Connect your Blink Sync Module and cameras to the extended network.
- Verify that the devices maintain a stable connection and operate without interruptions.
17. Contacting Blink Customer Support
If all else fails, don’t hesitate to reach out to Blink’s customer support. They have the expertise to diagnose and resolve issues specific to Blink devices and can provide tailored guidance to get your Sync Module back online.
Visit the official Blink support website or contact their customer support through the provided channels. Describe the issue you’re facing, including any troubleshooting steps you’ve already taken.
Follow the instructions and recommendations provided by Blink’s customer support team.
Conclusion
If you’re experiencing issues with your Blink Sync Module not connecting to WiFi, there are several troubleshooting steps and quick fixes that you can try.
By understanding common scenarios and reasons behind these connectivity issues, you can take appropriate actions to resolve them.
Additionally, implementing tips to improve WiFi connectivity and knowing how to reset the Blink Sync Module can help alleviate persistent problems.
With these measures in place, you can ensure a smooth and uninterrupted connection for your Blink Sync Module.