If your Blink local storage not working, you’re in the right place. I know how frustrating it can be. In this article, I will provide you with 15 quick and effective solutions to fix the problem.
From power cycling the sync module, testing or formatting USB drive storage, clearing cache or cookies to updating Blink software, disabling browser extensions and running a malware scan, I’ll guide you step by step through each solution.
Without wasting time – let’s get right into it.
Contents
- 1 How To Fix Blink Local Storage Not Working – 15 Effective Ways
- 1.1 1. Power Cycle the Blink Sync Module
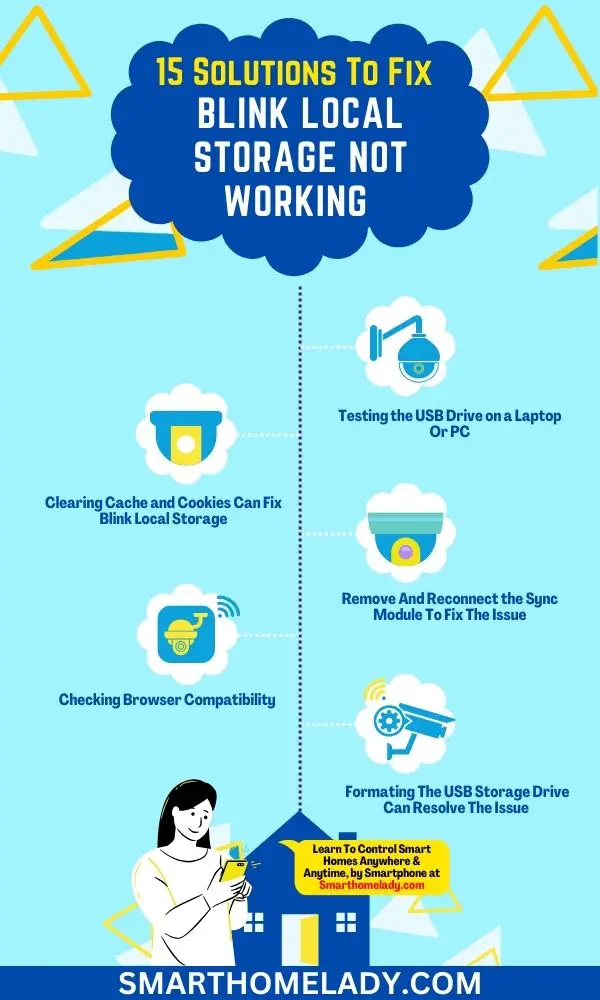
- 1.2 2. Testing the USB Drive on a Laptop Or PC
- 1.3 3. Clearing Cache and Cookies Can Fix Blink Local Storage
- 1.4 4. Remove And Reconnect the Sync Module To Fix The Issue
- 1.5 5. Factory Reset the Sync Module If Local Storage Not Working
- 1.6 6. Checking Browser Compatibility
- 1.7 7. Formating The USB Storage Drive Can Resolve The Issue
- 1.8 8. Ejection Of The USB Drive and Waiting Can Help You
- 1.9 9. Use a different Flash drive To Test
- 1.10 10. Updating Blink Software
- 1.11 11. Disabling Browser Extensions
- 1.12 12. Resetting Local Storage Settings
- 1.13 13. Running a Malware Scan
- 1.14 14. Increasing Local Storage Quota
- 1.15 15. Seeking Technical Support
- 2 Conclusion
How To Fix Blink Local Storage Not Working – 15 Effective Ways
Let’s address this problem step by step.
1. Power Cycle the Blink Sync Module
One of the simplest yet surprisingly effective methods to tackle Blink’s local storage issues is power cycling the Sync Module. Think of it as giving your Sync Module a quick refresh.
You can power cycle your Blink sync module in the following way:
- Unplug the power adapter from your Sync Module.
- Wait for about 10 seconds.
- Plug it back in.
This straightforward method often resolves minor glitches and can potentially kickstart your Blink local storage.
2. Testing the USB Drive on a Laptop Or PC
If power cycling doesn’t do the trick, it’s time to check the USB drive itself. Sometimes, the issue might not be with the Blink system but with the storage device.
Here’s the way to test the USB drive on a PC:
- Remove the USB drive from the Sync Module.
- Plug it into a PC or laptop.
- Check if your computer recognizes the drive. If it does, the problem may lie elsewhere; if not, it might be a faulty drive.
Testing it on another device helps you pinpoint the source of the problem. If it’s the USB drive, consider replacing it with a compatible one.
3. Clearing Cache and Cookies Can Fix Blink Local Storage
Clearing your cache and cookies can often resolve issues with Blink local storage not working.
Clearing your cache and cookies has a direct impact on Blink’s local storage performance. As the cache grows larger over time, it takes up more memory resources that could be used for storing data locally.
By clearing these temporary files, you free up valuable space for Blink local storage to function optimally.
4. Remove And Reconnect the Sync Module To Fix The Issue
One of the simplest yet surprisingly effective methods to resolve Blink’s local storage issues is to remove and reconnect the Sync Module. Think of it as giving your system a quick refresh.
You can do it in the following way:
- Locate the Sync Module – it’s that small box connected to your Blink camera system.
- Unplug the power adapter from the Sync Module.
- Wait for about 10 seconds.
- Plug the power adapter back in.
This quick and straightforward action often does the trick by clearing any minor glitches that may have been causing the storage problem. It’s like hitting the reset button on your system, and it can work wonders.
5. Factory Reset the Sync Module If Local Storage Not Working
If the previous step doesn’t resolve your Blink local storage issue, it’s time to consider a factory reset of the Sync Module. This step will bring the Sync Module back to its default settings, which can sometimes clear up persistent problems.
Here’s the way to factory reset the sync module:
- Find the small reset button on the Sync Module (usually located on the back).
- Press and hold the reset button for about 10 seconds until you see the LED light on the Sync Module start flashing.
- Release the button and wait for the Sync Module to complete the reset process. This might take a few minutes.
After the factory reset, you’ll need to reconfigure your Blink camera system and set up your local storage preferences again. If your local storage was hampered by software glitches, this should do the trick.
6. Checking Browser Compatibility
Make sure you’re using a browser that supports Blink local storage. When troubleshooting local storage errors, it is crucial to verify the compatibility of your browser with Blink local storage.
Blink local storage is a web API that allows websites to store data locally on a user’s device. However, not all browsers support this feature.
To check if your browser supports Blink local storage, you can visit the website or refer to the documentation provided by your browser vendor. If your current browser does not support Blink local storage, it may be necessary to switch to a compatible browser.
7. Formating The USB Storage Drive Can Resolve The Issue
Another important step to troubleshoot Blink’s local storage problems is formatting the USB storage drive. It might sound a bit drastic, but it can work wonders in resolving issues caused by corrupted files or incompatible formats.
Here’s the way to format a USB storage device:
- Safely remove the USB drive from your Sync Module.
- Plug it into a computer.
- Format the drive. You can usually do this by right-clicking on the drive in Windows or using Disk Utility on Mac.
Remember, formatting will erase all data on the drive, so make sure to back up any important footage before proceeding. Once it’s formatted, reinsert it into your Sync Module and check if your Blink local storage is back in action.
8. Ejection Of The USB Drive and Waiting Can Help You
Sometimes, local storage hiccups can be due to the USB drive itself. It’s worth trying this simple solution:
- Safely eject the USB drive from your Sync Module.
- Wait for a minute or two.
- Reinsert the USB drive into the Sync Module.
This brief pause can help clear any temporary issues with the drive and might get your Blink local storage working smoothly again.
9. Use a different Flash drive To Test
If formatting doesn’t solve the problem, it’s time to consider the possibility that your USB drive might be faulty. Sometimes, these drives can develop issues over time. To rule this out:
- Swap the current USB drive with a different one.
- Make sure the new drive meets Blink’s compatibility requirements (usually FAT32 or exFAT format).
- Reconfigure the camera settings to recognize the new drive.
If your local storage starts working with the new drive, you’ve pinpointed the problem. You may need to replace the old drive or contact Blink support for further assistance.
10. Updating Blink Software
To ensure that your browser is up to date with the latest version of the Blink software, you can check for updates in the settings menu. Updating the Blink firmware is crucial for a smooth and secure browsing experience.
Here are some steps you can follow:
- Open the browser settings menu by clicking on the three dots in the top right corner.
- Scroll down and click on ‘Settings’ to open the settings page.
- Look for ‘About’ or ‘About Blink’ in the sidebar and click on it.
- In this section, you will find information about your current Blink version and any available updates.
- If an update is available, click on ‘Check for updates’ or a similar button to initiate the update process.
Updating your Blink software not only ensures that you have access to new features but also fixes any known issues or vulnerabilities. It’s important to keep your browser up to date to avoid compatibility problems with websites and applications.
Stay proactive and make sure you have installed the latest version of Blink!
11. Disabling Browser Extensions
If you want to improve your browsing experience, disabling unnecessary browser extensions can help speed up your page loading times.
Disabling certain extensions, such as ad blockers, can also impact the way websites load and display content.
To disable browser extensions, follow these simple steps:
- Open your web browser settings.
- Navigate to the “Extensions” or “Add-ons” section.
- Look for the extension you want to disable in the list.
- Toggle the switch or click on “Disable” next to the extension name.
By disabling unnecessary extensions, you can reduce memory usage and improve overall browsing speed. It is important to note that not all extensions need to be disabled; only those that are causing issues or are no longer needed should be turned off.
Here’s an example table showcasing some commonly used browser extensions and their impact on page loading times:
| Extension Name | Impact on Page Loading Times |
|---|---|
| Ad Blocker | Can significantly decrease load times by blocking ads. |
| Password Manager | Generally does not affect page loading speeds. |
| Grammar Checker | May slightly increase load times due to real-time checks. |
| Video Downloader | Can slow down page loading when scanning for downloadable videos. |
Troubleshooting your browser settings by disabling unnecessary extensions is a practical step towards improving your browsing experience and optimizing page loading times.
12. Resetting Local Storage Settings
Resetting your browser’s local storage settings can help resolve issues and improve the performance of certain websites.
Local storage is a feature that allows web applications to store data locally on your device, such as user preferences or login information. However, sometimes local storage settings can become corrupted or misconfigured, leading to errors and malfunctioning websites.
To reset your browser’s local storage settings, follow these steps:
- Open your browser’s settings menu.
- Navigate to the privacy or security section.
- Look for an option related to clearing browsing data or deleting cookies.
- Select this option and ensure that it includes clearing local storage data.
- Click on the clear button or confirm the deletion process.
By resetting your browser’s local storage settings, you are essentially starting with a clean slate. This can help troubleshoot any issues related to stored data that may be causing errors on specific websites.
Note – Resetting local storage settings will remove all stored data from your browser, including saved passwords and preferences for other websites. Therefore, it is recommended to back up any important information before proceeding with the reset.
13. Running a Malware Scan
Running a malware scan can help detect and remove any malicious software that may be causing issues with your browser’s local storage settings.
Perform a thorough malware scan using reliable antivirus or anti-malware software. Ensure that the software is up-to-date to identify the latest threats effectively. This scan will search for any malicious files or programs that could be affecting your browser’s local storage settings.
14. Increasing Local Storage Quota
Local storage is a feature in web browsers that allows websites to store data locally on your device. However, there is a limit to how much data can be stored.
If you’re experiencing issues with local storage not working properly, it may be because the default quota is too low for your needs.
To optimize local storage performance and avoid errors, you can increase the quota allocated to your browser. This can be done by modifying the settings or preferences of your specific browser.
In Google Chrome, for example, you can increase the local storage quota by;
- Accessing the ‘Settings’ menu, click on ‘Advanced,’ and then select ‘Privacy and Security.’
- From there, choose ‘Site Settings,’ followed by ‘Additional Content Settings’ and finally ‘Storage.’ Here, you’ll have the option to adjust the local storage quota.
15. Seeking Technical Support
If you’re experiencing issues with Blink local storage, seeking technical support can provide helpful guidance and solutions. They have the expertise to diagnose and resolve any issues that may arise.
Whether it’s a problem with data not being stored correctly or difficulties retrieving stored information, technical support can guide you through the troubleshooting process.
I’ve personally faced and resolved these Blink local storage challenges, so I can ensure the effectiveness of these solutions.
Remember, resolving Blink local storage issues often involves a bit of trial and error, but these steps should get you started on the right track.
Conclusion
By following the 15 quick solutions mentioned above, you should be able to fix the issue of Blink local storage not working.
By implementing these steps correctly and thoroughly analyzing your specific situation, you will likely find success in resolving the issue and restoring the functionality of Blink local storage.
I’ve become an eager follower of this stellar website over the past week. The owner clearly pours passion into serving up top-notch content that wows readers. I applaud their dedication and hope they keep up the ace work!
Your blog post had me hooked from the very beginning!