Are you struggling to keep your dome security cameras clean? Don’t worry; it’s a common issue. As an experienced security camera user, I believe that dirty lenses or smudges compromise the quality of footage captured by these cameras.
I have dome security at the front door of my home, and it requires regular cleaning for proper functioning. Cleaning dome security cameras is not as complicated as some might think.
In this article, I will provide you with a step-by-step guide for how to clean dome security cameras. We will go through some basic techniques for cleaning dome security cameras effectively.
So whether you’re a homeowner looking to improve your home surveillance system or a business owner seeking to enhance your commercial security measures, read on to learn how to clean dome security cameras.
Contents
- 1 10 Steps On How To Clean Dome Security Cameras
- 1.1 Understand The Importance Of Camera Maintenance
- 1.2 Prepare Your Cleaning Materials
- 1.3 Safety Precautions To Take Before Cleaning
- 1.4 Identifying Areas That Need Cleaning
- 1.5 Removing Dust And Debris From The Exterior
- 1.6 Cleaning The Dome Lens
- 1.7 Use A Cleaning Solution For Stubborn Stains
- 1.8 Properly Drying The Camera To Prevent Water Damage
- 1.9 Reassembling The Camera Components
- 1.10 Testing The Camera To Ensure It Is Functioning Properly
- 2 Schedule Regular Maintenance For Your Security Cameras
- 3 Conclusion
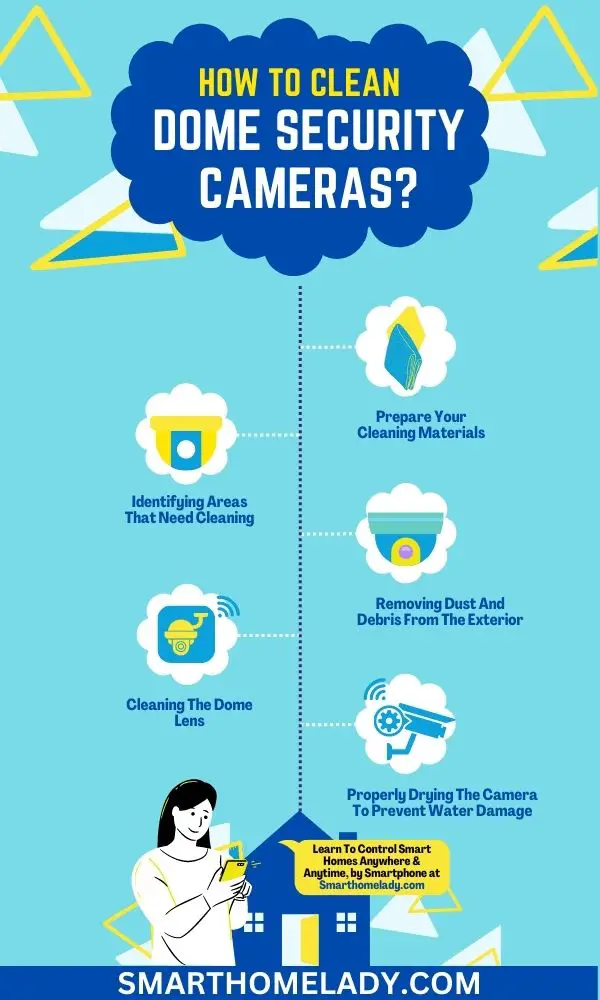
10 Steps On How To Clean Dome Security Cameras
Dome security cameras are commonly used for indoor and outdoor surveillance. However, over time they can accumulate dust, dirt, and other debris that can affect their performance.
Here are 10 steps on how to clean dome security cameras to ensure they continue to function properly and provide clear footage.
Step 1
Understand The Importance Of Camera Maintenance
As a smart homeowner and smart technology user, I cannot emphasize enough the importance of regular maintenance for your dome security cameras. These devices are essential for ensuring the safety and security of your property, but neglecting their upkeep can lead to costly repairs or even replacement.
Fortunately, there are cost-effective camera upkeep strategies that you can implement to keep them in top condition.
One important step is to regularly clean the lenses and housing using appropriate materials. This will prevent dust and dirt buildup from obstructing the view and compromising image quality.
Regular maintenance also includes checking for any physical damage or signs of wear and tear. By catching these issues early on, you can avoid more expensive repairs down the line.
Remember, investing time into maintaining your cameras now can save you money in the long run.
Step 2
Prepare Your Cleaning Materials
Now that we understand how important it is to maintain our security cameras, let’s dive into the actual process of cleaning them.
Before starting any cleaning procedure, it is essential to gather all the necessary materials and tools. In this section, I will guide you through selecting appropriate cleaning cloths and provide tips for cleaning hard-to-reach areas.
Select the Right Type Of Cloth
Choosing the right type of cloth can make a significant difference in maintaining your dome camera’s efficiency.
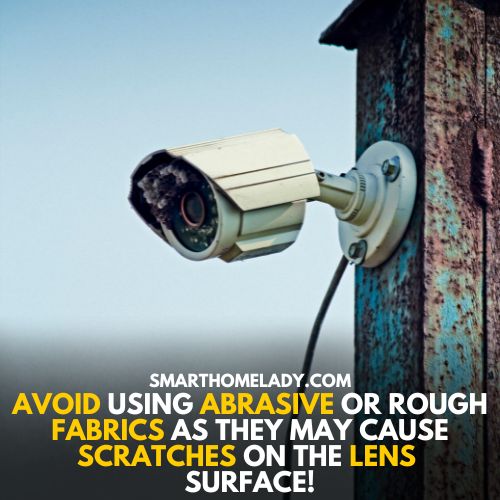
Avoid using abrasive or rough fabrics as they may cause scratches on the lens surface. Instead, use microfiber or cotton-based lint-free cloths. These clothes are known for their softness and effectiveness in picking up dirt and grime without leaving any particles behind.
Precautionary Measures
When dealing with hard-to-reach areas like corners or crevices, there are particular methods to follow to avoid damaging your camera accidentally.
First, do not use water sprays or other liquids to clean these areas, as they may seep into the camera’s internal components and cause irreversible damage. Instead, gently use compressed air blowers or soft brushes to remove dust particles from these tight spaces.
Few Tips
- Use gentle circular motions when wiping down the dome cover.
- Always turn off the power supply before beginning cleaning procedures.
- Clean lenses first before proceeding with other parts of the camera.
- Do not touch sensitive electronic components unless required.
- Allow enough time for everything to dry completely after cleaning.
Before starting your camera maintenance routine, consider some safety precautions that must be taken beforehand.
Step 3
Safety Precautions To Take Before Cleaning
Before cleaning any dome security camera, it is crucial to take safety precautions. As a cleaning expert, I highly recommend using goggles before starting the process.
Dome cameras are usually installed high above ground level and can accumulate dust or debris over time, which may fall on you while cleaning. Therefore, wearing protective eyewear will prevent any hazardous particles from entering your eyes.
Cleaning high-mounted cameras requires extra care, so ensure you have someone else present with you while performing such tasks. Additionally, always wear gloves while handling chemicals or oils and avoid direct contact with skin or eyes at all times.
Following proper safety guidelines is crucial to ensuring a smooth and safe operation while keeping your security equipment running efficiently over an extended period of time.
The importance of these steps cannot be overstated since accidents during maintenance can result in costly repairs or even the replacement of damaged parts.
Step 4
Identifying Areas That Need Cleaning
After taking the necessary precautions, it’s time to identify which areas of your dome security camera need cleaning. It is important to note that different camera parts may require varying levels of attention and maintenance depending on their location and usage.
- Firstly, start by assessing the exterior of the camera. Check for any visible signs of dirt or dust buildup around the lens cover, mounting bracket, and cables.
- Secondly, inspect the interior components, such as the lenses and sensors, for grime or smudges that can impact image quality.
- Lastly, check for any debris that might have been collected inside the housing unit.
Cleaning Frequency of Dome Cameras
Cleaning frequency will depend on several factors, such as environmental conditions (e.g., high humidity), amount of use, and level of exposure to outdoor elements.
However, we recommend performing routine checks every three months at a minimum to ensure optimal performance.
Step 5
Removing Dust And Debris From The Exterior
As an experienced security camera user, I know that removing dust and debris from the exterior of dome cameras is crucial for maintaining their functionality.
Compressed air is an effective way to remove any dirt or grime buildup on the exterior of your dome camera.
Note: Make sure to hold the canister at least six inches away from the surface as you spray in short bursts. This will prevent any damage to the device while effectively blowing away unwanted particles.
Once you’ve cleared off most of the debris using compressed air, you can use a microfiber cloth to gently wipe down any remaining residue.
Step 6
Cleaning The Dome Lens
Maintaining a clean dome lens is essential for ensuring clear and uninterrupted footage from your security camera. To keep it in good working condition, you must implement a regular cleaning technique that suits your environment’s needs.
The maintenance frequency of Doom Lens may vary depending on factors like weather conditions, dust levels, and camera location.
A simple yet effective way to clean your dome lens is by using a microfiber cloth or soft-bristled brush. Gently wipe the surface of the lens with circular motions to remove any dirt or debris buildup.
Avoid using abrasive materials or harsh chemicals, as they can damage the protective coating on the lens.
Proper cleaning techniques are necessary to prevent stubborn stains from accumulating on your security camera’s dome lens. If you notice any persistent marks that won’t come off with dry wiping, consider using a cleaning solution specifically designed for this purpose.
Step 7
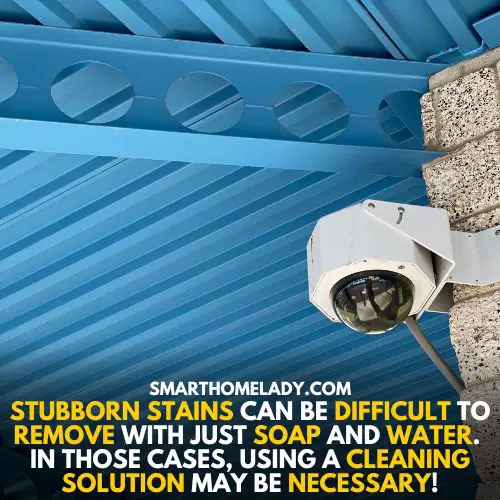
Use A Cleaning Solution For Stubborn Stains
Sometimes stubborn stains can be difficult to remove with just soap and water. In those cases, using a cleaning solution may be necessary.
When it comes to cleaning solutions for your dome security cameras, there are alternatives to harsh chemicals that can potentially damage the camera’s surface.
One option is to use DIY cleaning solutions made from ingredients you likely already have at home. For example, mixing equal parts vinegar and water can create an effective and natural cleaning solution.
Another alternative is purchasing a specialized cleaning solution for electronic devices. These products are typically formulated to clean without leaving residue or causing any harm to delicate surfaces like those found on security cameras.
Step 8
Properly Drying The Camera To Prevent Water Damage
As we have discussed earlier, the dome security cameras are prone to moisture buildup and corrosion. Hence, it is crucial to dry them properly after cleaning. You can gently wipe the camera’s surface with a clean microfiber cloth or a soft-bristled brush.
Once you have cleaned the camera, let it air dry for some time before reassembling its components.
Avoid using any heat source, as excessive heat may damage the camera’s internal components. Additionally, ensure no water is left inside the camera housing or lens area.
Preventing corrosion and avoiding moisture buildup in your dome security cameras should be your top priority. A little extra care while cleaning and drying these devices can go a long way in ensuring their longevity and optimal functioning over time.
So, take out some time to properly maintain your security cameras to avoid any potential issues later on.
Step 9
Reassembling The Camera Components
Now that you’ve finished cleaning the dome security camera, it’s time to reassemble the components. Begin by carefully realigning screws and securing them in place. Ensure not to over-tighten, as this can cause damage to the camera.
Once all screws are securely fastened, take a moment to visually inspect for any loose or misplaced parts.
Now that we have successfully reassembled our cleaned dome security camera, it’s time to move on to the next crucial step: testing its functionality.
By taking these extra steps, we can guarantee that our camera will perform optimally and provide us with clear footage when needed most.
Step 10
Testing The Camera To Ensure It Is Functioning Properly
Now that you have cleaned your dome security camera, it is important to ensure that it is functioning properly before putting it back into service. Testing the camera will help identify any potential issues and save time and money in the long run.
To test functionality, connect the camera to power and monitor its performance on a screen or mobile device. Check for any glitches or issues with picture quality. Any problems should be addressed before installation to avoid further complications down the line.
- Realign screws carefully during assembly
- Inspect all components for proper placement
- Test functionality after reassembly
- Monitor performance on a screen or mobile device
- Address any issues before installation.
By taking these steps, you can ensure that your dome security cameras continue providing reliable surveillance for years.

Schedule Regular Maintenance For Your Security Cameras
How often do you clean your security cameras? Once a month? Every few months, maybe? If you want to ensure that your dome security cameras are working at their best, then scheduling regular maintenance is crucial. But how frequently should you be doing it?
The frequency of maintenance will largely depend on the environment in which your cameras operate.
Cameras installed indoors may require less frequent cleaning than those exposed to harsh outdoor conditions such as dust storms or heavy rain.
As a general rule of thumb, I recommend having your security cameras professionally cleaned at least once every six months.
Professional cleaning services offer more comprehensive maintenance that goes beyond simple cleaning tasks like what was mentioned above. Besides removing dirt build-up, they can check for technical issues and replace damaged parts if necessary.
The importance of professional cleaning cannot be overstated, as it prolongs the lifespan of your equipment while ensuring optimum performance year-round.
Conclusion
In conclusion, keeping your dome security cameras clean and clear is essential to ensure that they function optimally and provide the best possible surveillance for your property.
By following the simple steps outlined in this article, you can easily maintain the cleanliness of your dome security cameras and prevent any potential issues caused by dirt, dust, or debris buildup.
So, whether you’re a homeowner or a business owner, make sure you include regular cleaning of your dome security cameras as part of your routine maintenance.
Remember, a clean camera is reliable, and that’s what you need to keep your property safe and secure.