Are you frustrated with your Wyze camera stuck on Ready to Connect? Don’t worry, I’ve got you covered.
In this article, I will explore the common causes behind this issue and provide you with 8 effective ways to fix it.
From checking your network connectivity to updating the firmware and troubleshooting Wi-Fi signal issues, we have all the solutions you need.
So let’s dive in and get your Wyze camera up and running smoothly again.

Contents
6 Common Causes of Wyze Camera Stuck on Ready to Connect
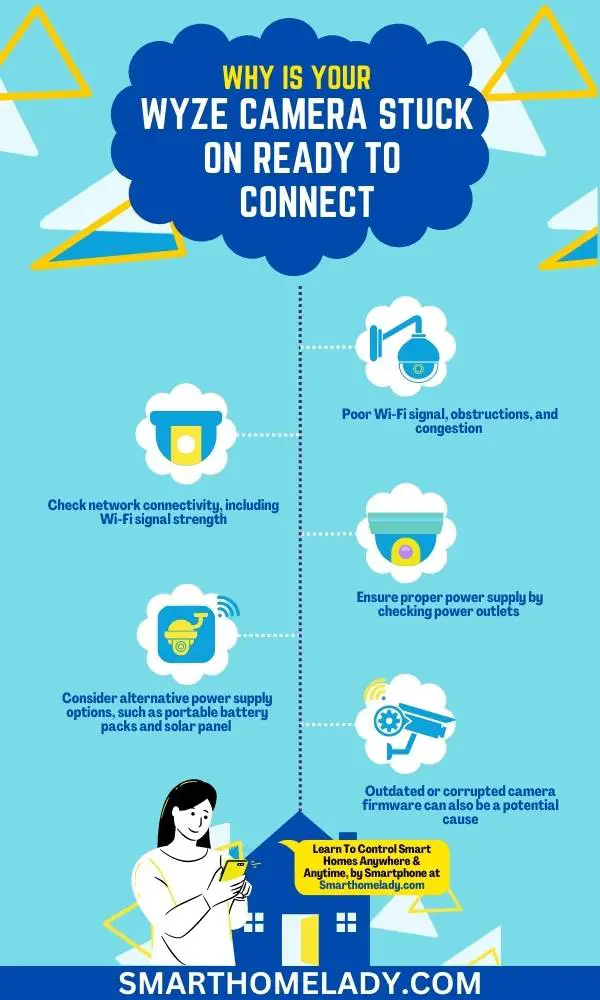
One of the most common causes of a Wyze camera stuck on Ready to Connect is a poor Wi-Fi signal. Here are 6 common causes of Wyze Camera getting stuck on ready-to-connect.
- Weak Wi-Fi Signal – One common cause for your Wyze camera being stuck on “Ready to Connect” is a weak Wi-Fi signal. If the camera is too far from your router or there are obstacles like walls or furniture blocking the signal, it may struggle to establish a stable connection.
- Incorrect Wi-Fi Credentials – Double-checking your Wi-Fi credentials is crucial when setting up your Wyze camera. Entering the wrong network name or password can prevent the camera from connecting to your Wi-Fi network, leaving it stuck in the “Ready to Connect” phase.
- Network Firewall or Router Settings – Sometimes, your network’s firewall or router settings can interfere with the camera’s connection. Certain security settings may block the camera’s communication with the cloud servers, causing it to remain stuck in the setup process.
- Camera Firmware Issues – Outdated or corrupted camera firmware can also be a potential cause for the “Ready to Connect” problem. Ensuring that your Wyze camera has the latest firmware version installed is essential to avoid any glitches or connectivity issues.
- Power Supply Problems – Insufficient power supply or a faulty USB cable can hinder the camera’s ability to establish a proper connection. If the camera does not receive enough power, it may struggle to boot up correctly and remain stuck in the setup phase.
- Server or Cloud Service Issues – Occasionally, the issue may not lie with your camera or network but rather with the Wyze server or cloud service itself. Temporary server maintenance or interruptions can prevent your camera from connecting, causing it to remain stuck on “Ready to Connect.”

Remember – Troubleshooting steps may vary depending on your specific model and circumstances.
Always consult the official Wyze support resources or contact their customer service for detailed assistance in resolving the “Ready to Connect” issue with your Wyze camera.
Related Articles Of Wyze Camera
- How To Setup Wyze Cam – Follow 8 Simple Steps
- How To Factory Reset Wyze Camera? Step By Step Guide
- How To Change WiFi On Wyze Camera – A Step By Step Guide
- All Wyze Devices Offline – Quick & Easy Ways
7 Ways To Fix Wyze Camera Stuck On “Ready To Connect”
If your Wyze camera is stuck on “Ready to Connect,” it may be due to a connectivity issue. Here are some steps you can take to resolve this problem.
1. Check Network Connectivity
To ensure your Wyze camera connects successfully, make sure your network is functioning properly.
Here are some steps you can take to troubleshoot network issues and check device compatibility:
- Check your Wi-Fi signal strength: Ensure that your camera is within range of your Wi-Fi router and that there are no physical obstructions blocking the signal.
- Restart your router: Sometimes, simply restarting your router can resolve connectivity issues. Unplug it from the power source, wait for a few seconds, and then plug it back in.
- Verify SSID and password: Double-check that you are entering the correct Wi-Fi network name (SSID) and password during the setup process. Typos or incorrect information can prevent a successful connection.
If you have followed these steps and are still experiencing issues with connecting your Wyze camera, there may be other factors at play.
- It’s important to ensure that your camera is compatible with your network setup.
- Check if there are any specific requirements or restrictions listed in the user manual or on the manufacturer’s website.
By troubleshooting network problems and ensuring device compatibility, you can increase the chances of successfully connecting your Wyze camera.
2. Ensure Proper Power Supply
If you’re experiencing issues with the power source for your device, troubleshooting the power supply should be your first step.
Start by checking if the power outlet is working properly or if there’s a loose connection.
Ensure that the power adapter is properly connected to a working outlet. Check for any loose connections or frayed wires.
If everything seems fine, try using a different power adapter to rule out any problems with the current one. Additionally, verify that you are using the correct voltage for your camera model.
If the problem persists, consider exploring alternative power supply options such as using a different power adapter or trying out a battery-powered solution to ensure uninterrupted operation.
3. Update Wyze Camera Firmware
Firmware updates are crucial for the optimal performance and security of your Wyze camera.
By regularly updating the firmware, you can ensure that your camera is equipped with the latest features, bug fixes, and enhancements.
However, if you encounter any issues while updating or installing the firmware, troubleshooting steps can help you resolve them efficiently and get your camera back up and running smoothly.
Here is a quick way to update Wyze Camera firmware.
- To check for firmware updates, simply open the Wyze camera app on your device and navigate to the settings menu.
- Look for an option like ‘Firmware Update’ or ‘Check for Updates.’
- Follow the on-screen instructions to download and install the latest firmware version if one is available.
- Remember to connect your camera to a stable internet connection during this process.
Taking a few minutes to update your camera’s firmware regularly can go a long way in ensuring its optimal performance and security.
4. Reset Wyze Camera Settings
To reset your Wyze Camera settings, you can simply follow these steps:
- First, locate the reset button on the back of your camera. It is a small hole that you can press using a paperclip or a pin.
- Next, gently insert the paperclip or pin into the hole and hold down the reset button for about 10 seconds.
- Release the button after 10 seconds and wait for the camera to reboot.
Related Articles Of Wyze Camera
- Wyze Camera Offline – 6 Reasons and Quick Solutions
- Wyze Cam Won’t Scan QR Code – 8 Troubleshooting Steps
- Wyze Camera Not Recording Events – 08 Causes With Fixes
- 5 Reasons Your Wyze Camera Not Working – Quick Solutions
5. Clear Cache and Data
When clearing the cache and data on your device, you will be able to free up storage space and potentially resolve any performance issues.
Clearing the cache and data is a troubleshooting step that can help fix various problems you may be experiencing with your device. Here is a way to clear Cache and Data.
- To clear the cache on your device, go to the Settings menu and find the Apps or Applications section.
- From there, locate the specific app that you want to clear the cache for.
- Once you have found it, tap on it and then select the option to clear the cache. This will remove temporary files that may be taking up unnecessary storage space.
If clearing the cache does not solve your issue, you can also try clearing the data for the problematic app. This step should be approached with caution as it will delete all of your app’s settings and stored information.
To do this, follow similar steps as clearing the cache but instead, select ‘clear data’ or ‘delete app data’.
Keep In Mind – This action cannot be undone, so make sure to back up any important information before proceeding.
Clearing both the cache and data can often help resolve issues such as crashes, freezing, or slow performance.
However, if these steps do not solve your problem, further troubleshooting may be required, or contacting customer support for assistance would be recommended.

6. Troubleshoot Wi-Fi Signal Issues
One way you can improve your Wi-Fi signal is by repositioning your router to a central location in your home.
By doing this, you can ensure that the signal is evenly distributed throughout your living space, minimizing dead zones and maximizing coverage.
Additionally, it’s important to analyze potential sources of interference that may be affecting your Wi-Fi signal.
To troubleshoot Wi-Fi signal issues, consider using Wi-Fi range extenders. These devices help amplify and extend the reach of your existing Wi-Fi network.
In addition to using range extenders, conducting an interference analysis can also be beneficial. Identify any nearby devices or appliances that may be causing interference with your Wi-Fi signal.
Common culprits include cordless phones, baby monitors, microwave ovens, and even certain types of walls or furniture materials.
By minimizing their proximity to your router and adjusting their placement as necessary, you can reduce the impact of these sources on your Wi-Fi signal.
Related Articles Of Wyze Camera
- Wyze Camera Not Connecting? Cause And Troubleshooting
- Wyze Camera Not Connecting To WiFi – 8 Ways To Fix It
- Wyze Cam Constant Yellow Light & 5 Ways To Fix It
- Why Is Wyze Base Station Not Connecting – 9 Ways To Fix
7. Contact Wyze Support for Further Assistance
If you need further assistance, reach out to Wyze Support for help with your Wi-Fi signal issues.
They are available to provide expert guidance and troubleshooting tips to resolve any problems you may be experiencing with your Wyze camera.
Here are four reasons why contacting Wyze Support is the best solution:
- Expert Assistance – Wyze Support consists of knowledgeable professionals who have extensive experience in dealing with Wyze cameras and their connectivity issues. They can offer personalized solutions based on your specific situation.
- Prompt Response – When you contact Wyze Support, they prioritize resolving your issue in a timely manner. Their team understands the importance of having a reliable Wi-Fi connection for your camera’s functionality.
- Comprehensive Troubleshooting – The support team will guide you step-by-step through the troubleshooting process to identify and address any underlying issues affecting your camera’s connectivity.
- Warranty Coverage – If your camera is still under warranty, contacting Wyze Support ensures that you receive all the benefits entitled to you as a customer, including potential replacements or repairs if necessary.
Frequently Asked Questions FAQs
How do you force a WYZE camera to reset?
If you need to reset your WYZE camera, follow these steps:
1. Locate the reset button on the camera. It is usually found on the bottom or back of the device.
2. Use a small pin or paperclip to press and hold the reset button for about 10 seconds.
3. Release the button when you see the camera’s status light start flashing yellow.
4. Wait for the camera to complete the reset process. This may take a couple of minutes.
5. Once the camera’s status light turns solid blue, it means the reset is complete.
Why is my WYZE camera not connecting to the network?
If your WYZE camera is having trouble connecting to the network, there could be a few reasons for this. Here are a few troubleshooting steps to try:
1. Check if your Wi-Fi network is working properly. Ensure that other devices can connect to the network without any issues.
2. Make sure your WYZE camera is within range of your Wi-Fi router. If it is too far away, it may have trouble establishing a stable connection.
3. Verify that you are entering the correct Wi-Fi password during the camera setup process. Double-check for any typos or errors.
4. Restart your camera by unplugging it from the power source, waiting for a few seconds, and then plugging it back in.
5. If your camera still won’t connect, try resetting it to factory settings by following the steps mentioned earlier.
Why is my WYZE camera not loading?
If your WYZE camera is not loading or displaying a live feed, there could be a few factors causing this issue. Here’s what you can do to resolve it:
1. Check your internet connection. Ensure that your Wi-Fi network is working fine and that other devices can access the internet without any trouble.
2. Verify if the camera’s power source is stable. If the camera is losing power intermittently, it may lead to loading issues. Try connecting it to a different power outlet or using a different power cable.
3. Make sure you have the latest version of the WYZE app installed on your smartphone or tablet. Outdated app versions may not be fully compatible with the camera’s firmware.
4. Restart your camera by unplugging it from the power source, waiting for a few seconds, and then plugging it back in.
5. If the problem persists, try resetting the camera to factory settings and reconfigure it using the WYZE app.
How do you fix a bricked Wyze camera?
If your WYZE camera is bricked and not responding, you can attempt to fix it by following these steps:
1. Disconnect the camera from the power source and remove any memory cards.
2. Press and hold the camera’s setup button while reconnecting it to the power source.
3. Continue holding the setup button for about 20 seconds or until the status light flashes yellow.
4. Release the setup button and wait for the camera to complete the flashing process. This might take a few minutes.
5. Once the camera’s status light turns solid blue, it means the camera should be responsive again.
6. Reconfigure the camera using the WYZE app, ensuring that you follow the setup instructions correctly.
Remember, if these troubleshooting steps don’t resolve the issue with your WYZE camera, it’s always a good idea to reach out to WYZE customer support for further assistance.
Conclusion
So, if your Wyze camera is stuck on ‘Ready to Connect’, there are several potential causes and solutions.
First, check your network connectivity and ensure a stable Wi-Fi signal. Make sure the camera is receiving a proper power supply and update its firmware if necessary.
Resetting the camera settings and clearing the cache can also help resolve the issue. If all else fails, don’t hesitate to contact Wyze Support for further assistance.
By following these steps, you should be able to get your Wyze camera back up and running in no time.
Sources
- Wyze Cam Stuck on ready to connect – Forum By Wyze (View Source)
- Fix Wyze Cam Issues (View Source)


